
How to Clean Post Construction Dust: 7-Step Guide
Table of Contents
Step 1: Remove Large Debris Before You Touch the Dust
How Long Does Construction Dust Take to Settle?
Step 2: How to Clean Drywall Dust Without Spreading It
Dry Methods First: Dusting Walls and Ceilings
Damp Wiping Hard Surfaces and Wood
Step 3: Choosing the Best Vacuum for Construction Dust
Why a Household Vacuum Fails
Filter and Canister Maintenance
Step 4: Cleaning Floors, Carpets, and Vents
Step 5: Your Post-Renovation Cleaning Checklist, Room by Room
HVAC and Indoor Air Cleanup
Staying Safe: Health Risks and the Right Protective Equipment
When to Stop and Call a Professional
The Right Protective Equipment
Ventilation and Containment
How to Tell When Post Construction Dust Cleanup Is Complete
Frequently Asked Questions
Last Updated: October 13, 2026
Step 1: Remove Large Debris Before You Touch the Dust
Learning how to clean post construction dust starts with one rule: never touch the fine dust first.
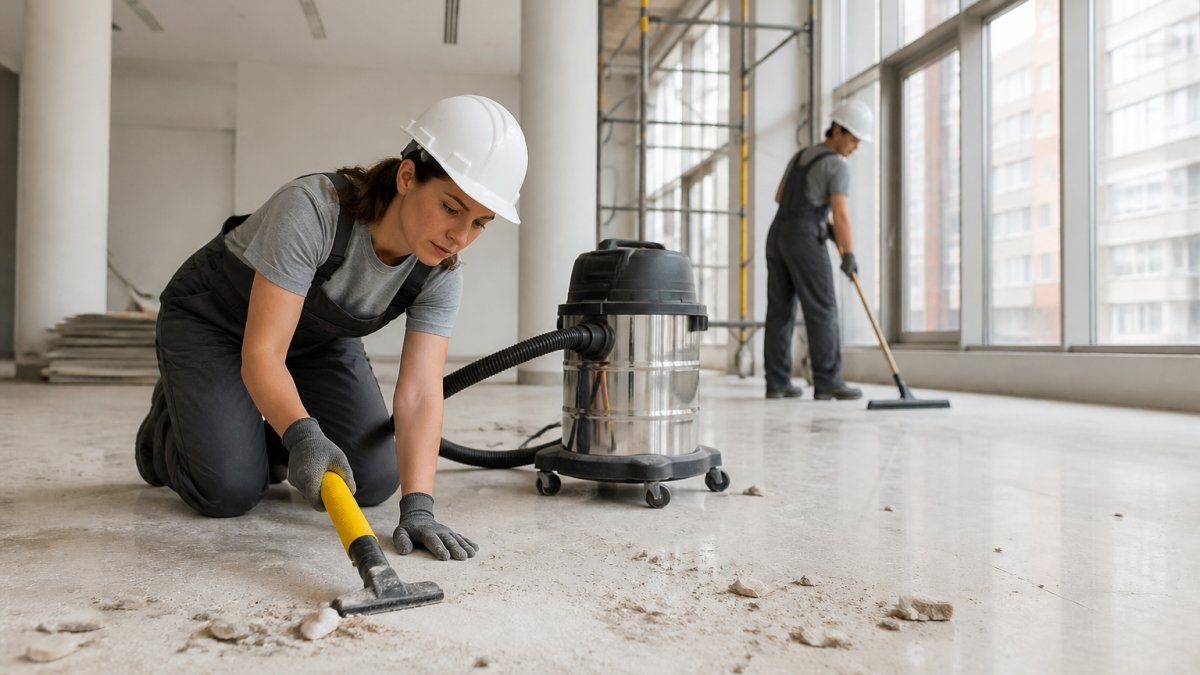
Large debris means chunks of drywall, wood scraps, nails, tile pieces, and plastic wrap. Grab these by hand or with a flat shovel and bag them.
Here's the order that works:
Clear large debris into heavy-duty bags
Remove protective film and tape from windows and fixtures
Sweep or rake remaining chunks into a pile
This step protects your finished surfaces. A nail dragged across new hardwood leaves a mark you can't fix.
Watch Out Sweeping dry dust with a broom sends fine particles back into the air. They resettle on surfaces you already cleaned. Always remove big debris first, then switch to damp or HEPA methods for the rest.
How Long Does Construction Dust Take to Settle?
Most construction dust settles within 24 to 48 hours after active work stops, but fine particles can stay airborne longer. Air movement, humidity, and ongoing trades all affect the timeline.
Drywall dust is the worst offender. These fine particles float for hours and travel through a building's air.
A common mistake is scheduling final cleaning the same day crews finish. Wait for dust to settle, then clean.
Step 2: How to Clean Drywall Dust Without Spreading It
The best way to clean drywall dust is dry methods first, then damp wiping. Drywall dust turns into a paste when it hits water. That paste smears into walls and clogs drains. So you lift the dry dust before you ever introduce moisture.
Dry Methods First: Dusting Walls and Ceilings
Start at the top. Dust ceilings and walls before floors, because gravity pulls everything down. Use a microfiber duster or a vacuum with a brush attachment on ceilings, corners, and light fixtures.
Work in overlapping strokes. Don't press hard. Drywall dust lifts easily when you let the tool do the work.
Ceilings and crown molding first
Walls from top to bottom
Light fixtures, vents, and ceiling fans
Damp Wiping Hard Surfaces and Wood
Once dry dusting is done, switch to damp wiping. Use a microfiber cloth wrung nearly dry. A dripping cloth ruins drywall and warps wood.
For most surfaces, plain water works. For greasy residue, a mix of white vinegar and water cuts through film without harsh chemicals. Rinse the cloth often and change the water as it gets cloudy.
Pro Tip Fold your microfiber cloth into quarters and flip to a clean side as each section gets dirty. You get eight clean passes per cloth before it needs rinsing. This keeps you from smearing dust back onto finished surfaces.
Step 3: Choosing the Best Vacuum for Construction Dust
The best vacuum for construction dust is a shop vacuum fitted with a HEPA filter, but "HEPA" on the box isn't enough.
Here's what separates a vacuum that works from one that just moves dust around:
True HEPA filtration rated HEPA H13 or higher. H13 captures 99.95% of particles at 0.3 microns; H14 captures 99.995%. Drywall dust and silica particles commonly fall in the 0.1-10 micron range, so anything below H13 lets the worst of it through.
A sealed system. Look for gaskets on the canister lid, a locking hose collar, and a filter seated with a rubber seal. A quick test: run the vacuum, then hold a tissue near every seam. If the tissue flutters, air, and dust, is escaping.
A bag plus a filter, not just a filter. Disposable collection bags keep the canister cleaner and make emptying far less dusty. Without a bag, you dump a cloud of fine powder every time you open the lid.

Why a Household Vacuum Fails
A standard household vacuum is built to trap hair, crumbs, and lint, not sub-micron powder. Fine drywall dust clogs the pleated filter within minutes, suction collapses, and the motor heats up.
If you must use a household vacuum as a stopgap, only do so with a HEPA-rated model, a fresh filter, and a bag, and expect to replace the filter afterward.
Filter and Canister Maintenance
Empty the canister outside, downwind of open windows and doors, never in the room you just cleaned.
Tap or brush the filter outdoors; do not wash a HEPA filter unless the manufacturer says it's washable, since water can damage the media.
Replace the filter when suction drops noticeably or the pleats are visibly caked. On a full renovation, that may mean more than one filter.
According to EPA guidance on indoor air quality during renovation, HEPA filtration captures the fine particles that standard filters miss, which is exactly why the seal and the rating matter as much as the filter itself.
Pro Tip Vacuum slowly. Rushing the wand over a floor leaves fine dust behind in the same way a fast mop pass does. Overlap each stroke by about half the wand width and let suction do the work.
Vacuum everything dry-dustable before any wet cleaning: floors, baseboards, vents, upholstery, and the tops of door frames. Once surfaces are wet, a vacuum can't safely pick up the paste that drywall dust becomes.
Step 4: Cleaning Floors, Carpets, and Vents
Floors come last because everything above them has already dropped. Match your method to the surface.
Surface | Method | Watch Out For |
Hard floors | HEPA vacuum, then damp mop | Don't flood; drywall dust turns to paste |
Carpets | HEPA vacuum twice, slow passes | Fine dust sinks deep into fibers |
Vents and registers | Remove grates, vacuum, wipe | Dust spreads when HVAC runs |
Baseboards | Damp wipe after vacuuming | Skip this and dust resettles fast |
For carpets, vacuum slowly and go over each area twice. Fine dust settles deep, and one quick pass won't reach it.
Vents deserve special attention. Every time the system runs, trapped dust blows back into the room. Remove the grates, vacuum inside, then wipe with a damp cloth.
Step 5: Your Post-Renovation Cleaning Checklist, Room by Room
A post-renovation cleaning checklist keeps you from missing spots. Work room by room and finish one space before moving to the next. Here's the order we use on commercial jobs.
Remove large debris and protective film
Dust ceilings, walls, and light fixtures
Damp wipe hard surfaces, cabinets, and wood
That last item matters. Dust resettles after your first pass. A second light dusting the next day catches what floated back down.
HVAC and Indoor Air Cleanup
HVAC systems trap construction dust in filters and ductwork. Replace air filters after the work ends. If dust was heavy, have ducts cleaned professionally. Running the system before cleanup just spreads particles through every room.
Staying Safe: Health Risks and the Right Protective Equipment
Construction dust isn't just messy. It carries real health risks, and some of them are serious enough to stop the job. Drywall dust contains crystalline silica; breathing fine silica particles can scar lung tissue over time and lead to silicosis. Sawdust, paint residue, and adhesives add their own hazards. In older buildings, the risk is higher still.
When to Stop and Call a Professional
Before you start cleanup, know what was disturbed. If the work touched any of the following, do not proceed on your own, stop, isolate the area, and bring in a qualified abatement or remediation professional:
Asbestos. Common in pre-1980s floor tile, mastic, pipe insulation, popcorn ceilings, and joint compound. Disturbing it releases fibers that cause serious long-term lung disease. There is no safe DIY cleanup once asbestos is suspected.
Lead paint. Common in homes built before 1978 (the EPA). Sanding or demolition creates lead dust that is especially dangerous to children and pregnant women. Lead-safe work practices and certified contractors are required for many renovations.
Heavy silica exposure. Cutting, grinding, or sanding concrete, stone, or brick generates respirable crystalline silica. Large jobs may require engineering controls and monitoring, not just a mask.
If you're unsure whether a material contains asbestos or lead, treat it as contaminated until a qualified professional tests it. Guessing is not worth the risk.
The Right Protective Equipment
For ordinary post-construction dust that you've confirmed is not hazardous:
An N95 or P100 respirator, not a cloth mask. A P100 offers more protection and is reusable; an N95 is fine for lighter dust. Fit matters, a beard or a loose strap breaks the seal.
Safety glasses or goggles. Dust and debris fly when you vacuum overhead or clear corners.
Gloves for handling debris, especially anything sharp.
The OSHA silica dust standards for construction require employers to limit worker exposure to respirable crystalline silica. If you're hiring a crew, ask how they control dust and protect workers, that's a fair question, not an intrusive one.
Ventilation and Containment
Ventilation helps, but direction matters. Open windows and use fans to push air outside, not to stir it around the room.
For larger jobs, plastic sheeting and zip walls keep dust from spreading into finished areas. Seal HVAC returns in the work zone so the system doesn't pull dust into the ducts, a mistake that turns a one-room cleanup into a whole-building problem.
Key Takeaway Safety gear isn't optional on post-construction cleanup, and neither is knowing what you're cleaning up. A cloth mask won't stop fine silica particles, use a fitted N95 or P100 respirator. And if the work disturbed asbestos, lead paint, or heavy silica, stop and call a qualified professional before anyone starts sweeping.
How to Tell When Post Construction Dust Cleanup Is Complete
Cleanup is complete when a white-glove test comes back clean. Wipe a dark cloth across surfaces, vents, and baseboards.
Run your hand along the top of door frames and window trim. These spots collect dust that falls later.
Here's the honest truth: one pass rarely finishes the job. Dust settles for a day or two after cleaning.
If your team is stretched thin, Phaze 2 Janitorial & Labor Services handles post-construction cleanup for contractors, developers, and property managers.
Frequently Asked Questions
Is breathing in construction dust safe?
No. Construction and renovation dust contains fine particles from drywall, silica, wood, and insulation that can irritate your lungs and worsen asthma or allergies. Drywall dust is especially fine and stays airborne for hours. Before you start cleaning, put on an N95 respirator, safety glasses, gloves, and long sleeves. Seal off the work area with plastic sheeting and open windows to improve airflow. If the dust contains asbestos or lead from an older building, stop and call a certified professional before disturbing it.
Can you vacuum drywall dust with a regular vacuum?
No. A standard household vacuum is not built for drywall dust. The fine particles pass through the filter, clog the motor, and blow back into the air, undoing your work. Use a shop vacuum fitted with a HEPA filter instead. Empty the canister outdoors and rinse the filter after each session, or the vacuum will lose suction and start spreading dust again. For heavy post-construction jobs, a HEPA-filtered vacuum with a sealed canister is the safest choice.
How many times should you clean after construction?
Plan on at least two full passes, and often three. The first pass removes large debris and most surface dust. The second pass catches the fine particles that settled after your initial cleaning. A third pass is common in high-traffic areas, on textured surfaces, and near vents where dust keeps reappearing. Wait a few hours between passes so airborne particles can settle. Post construction dust hides in corners, on top of cabinets, and inside vents, so check those spots before you call the job done.
What is the best cleaner for construction dust?
For most hard surfaces, warm water with a small amount of mild dish soap works well. For a natural option, mix one part white vinegar with three parts water in a spray bottle. Damp wipe with a microfiber cloth that has been wrung out so it is not dripping. Change the water and rinse your cloth often, because dirty water just moves dust around. Avoid oily or wax-based cleaners on fresh drywall and wood, since they can leave streaks and trap dust.
Post-construction dust cleanup is detail work, and missing spots costs you inspections and opening dates. Phaze 2 Janitorial & Labor Services brings screened, bonded crews and customized cleaning protocols to every job, backed by 24-hour emergency availability. From final dust passes to specialized floor care, we help you hand over a clean, inspection-ready building. Request a quote and get a cleaning plan built around your project schedule.
Request a Quote
Comments